Issues started with multiGet
or MGET
redisTemplate.opsForValue().multiGet(keys)
I ran command above in Clustered Redis and I saw that there were several MGET commands executed in different threads. I expected there would be one MGET command.
Later, I learned that my keys were landing to different slots. That’s why Spring Data Redis was executing several commands for each key.
There was nothing to do with it.
Second part of my work was I had several entities and for each entity I had to run several GETBIT
s. So I thought I can use pipelining.
Pipelining is recommended when you want to improve performance of your Redis operations. Because operations did not require to be serial, pipeline seemed perfect solution. In pipeline, commands were sent in batch through Redis connection and we just have to wait for answers.
So I ran pipelining and was shocked to see following
These were huge numbers.
Suspecting that it was related with pipelining, I tried to ran GETBIT
s in plain for loop and saw that something was happening with pipeline.
Of course, I could have executed those GETBIT
s parallely using threads but I wanted to squeeze better numbers so I decided to try LUA script.
The thing you should remember that all keys that are used in LUA script should have to be in same slot.
local bit1 = redis.call("GETBIT", key, value1)
local bit2 = redis.call("GETBIT", key, value2)
local bit3 = redis.call("GETBIT", key, value3)
And I saw following, which was huge improvement.
EVALSHA
- Evaluate a script from the server’s cache by its SHA1 digest.
In Linux Mint Cinnamon at least, I would easily tile windows using keyboard shortcuts Super
+Left
, Super
+Right
, Super
+Left
, Super
+Up
in same workspace.
I would easily move window to another workspace again using keyboard shortcuts.
Also using Devilspie2, I could limit apps to certain workspaces.
Currently, I feel pain because I need to use trackpad and drag windows to another workspace. Although Rectangle somehow helps in tiling windows to some extent.
Another painful moment is maximize button behavior(it creates new workspace).
I constanly alt-tabbing
to find my apps. No need to mention that there is no separate icon for multiple instances of same app. I use AltTab which brings Windows and Linux alt-tab behavior.
Terminal and Iterm 2 don’t support moving cursors word by word by default like in Linux using Ctrl
+ Right
or Ctrl
+Left
. For that you need to go options and change settings.
nano
also does not support same behaviour.
You can’t add some app to recommended list for opening files. It is especially needed when you want to open some kt
, js
or .cpp
file using Sublime Text
. OS X does not allow intuitive adding unless you must use Automator
or go to app’s plist
, edit it and run some command to link. As workaround, I open terminal and run cat
command to see contents of file.
Yes, it has Alfred or Raycast but I don’t want to buy Alfred and be locked to it. For example, Ulauncher is free and has much more plugins compared to Raycast.
Use cases
You already know this.
site:stackoverflow.com "interface"
Or other site
site:somesite.com "interface"
I generally try to use path
parameter to narrow. For example, for Typescript - path:*.ts
.
Sometimes some code snippets could be found in issues and discussions.
Some libraries use gitter
, where people share their code snippets.
Make copy of template in Google Sheets here
Same template with different link here
]]>I wrote a lot. And in my writings I use timestamps, dates, times, time-ranges.
I use following datetime formats
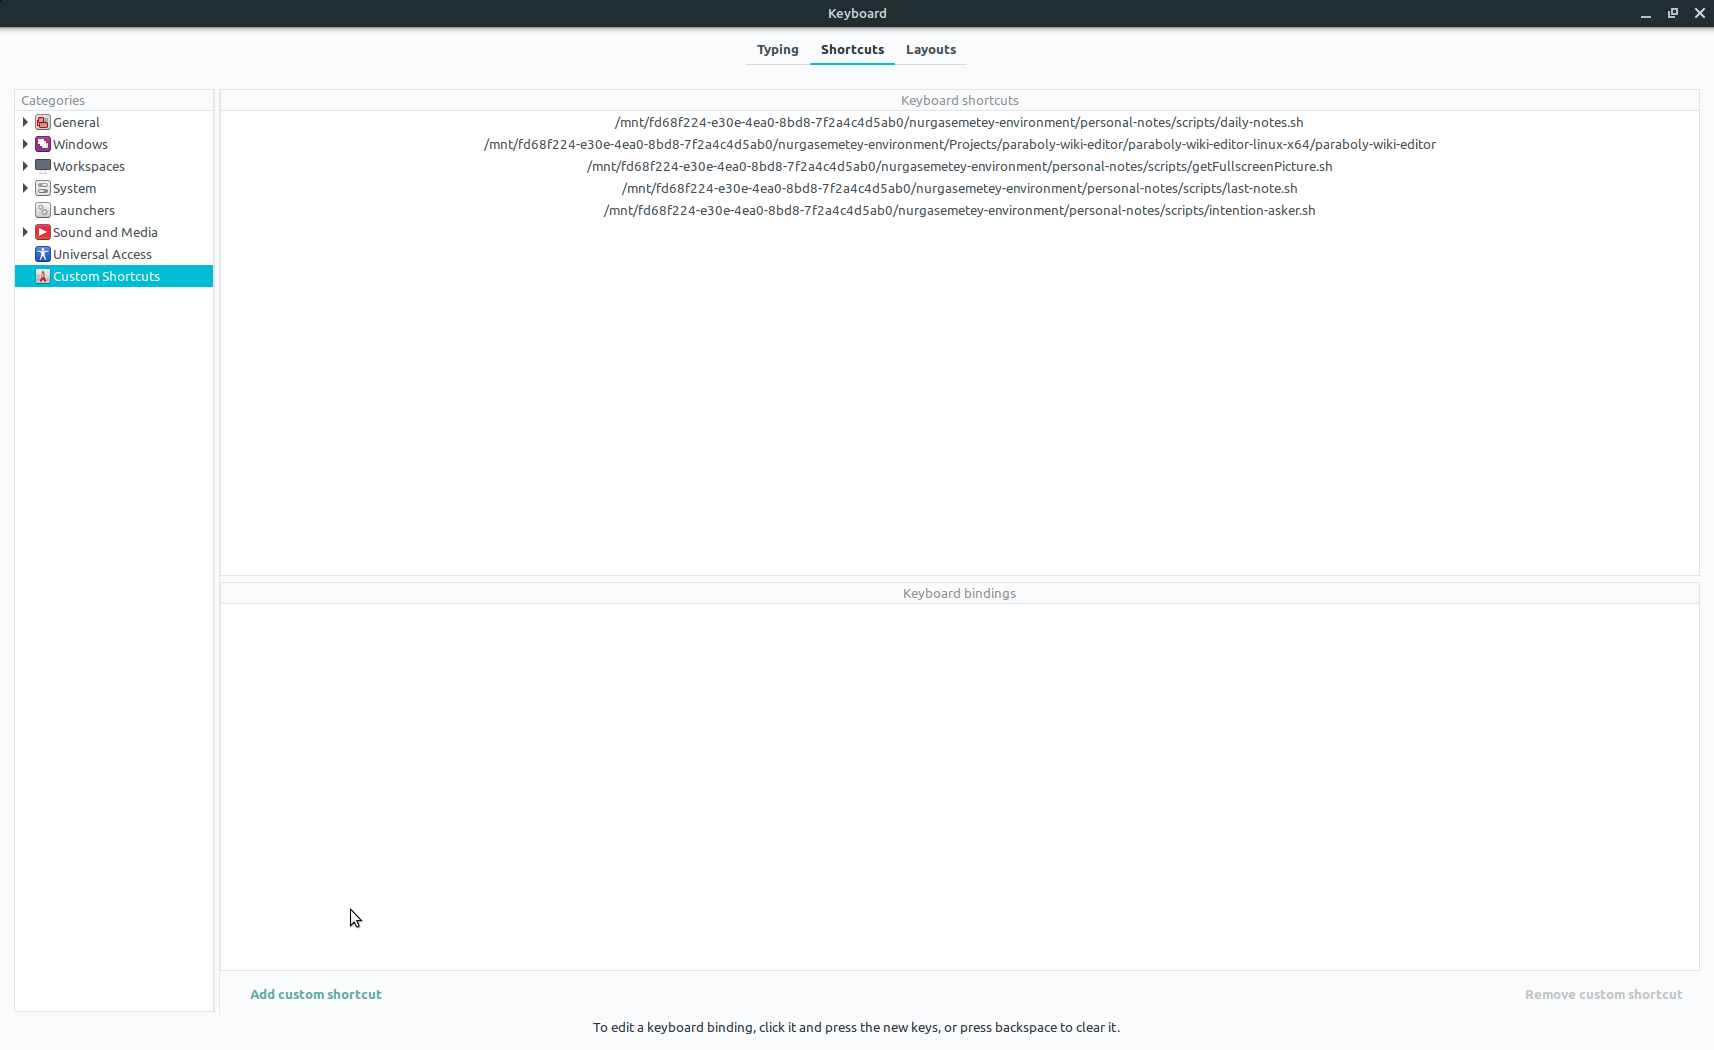
For them I used custom bash scripts which were copying to clipboard the date formats I wanted. These scripts were manually added to Linux’s custom shortcuts.
Example of bash script:
#!/bin/sh
alias setclip='xclip -selection c'
alias getclip='xclip -selection clipboard -o'
printf $(date +"%Y-%m-%d") | setclip
Initially, I was really happy but after some time number of custom scripts increased. I had difficulties with remembering them.
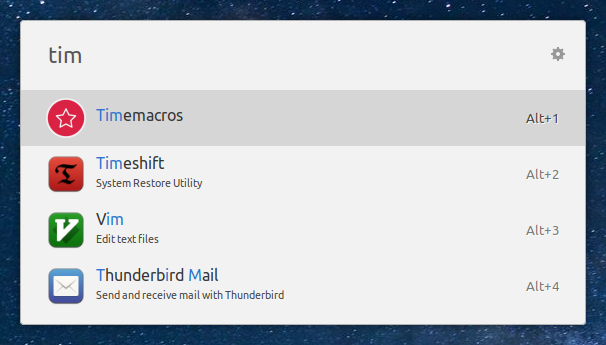
I stumbled to Ulauncher and it is downed on me that I could create extension for these timedate scripts.
For people who don’t know, Ulauncher is application launcher to which many developers write many extensions.
Some examples:
Here is the tutorial link for extension development.
Ulauncher requires that extension must have manifest.json
file to operate.
Example of manifest.json
{
"required_api_version": "^2.0.0",
"name": "Timestamp macros",
"description": "Copy to clipboard the most used timedate formats",
"developer_name": "Nurgazy Nazhimidinov",
"icon": "images/icon.png",
"options": {
"query_debounce": 0.05
},
"preferences": [
{
"id": "time_kw",
"type": "keyword",
"name": "Timemacros",
"default_value": "tm"
}
]
}
It says that if you write keyword Timemacros, extension will be on launcher(WARNING not clicked).
if you write Timemacros and click
or
write tm and SPACE
, then KeywordQueryEventListener(EventListener)
will invoked.
Here is the code:
class DemoExtension(Extension):
def __init__(self):
super(DemoExtension, self).__init__()
self.subscribe(KeywordQueryEvent, KeywordQueryEventListener())
class KeywordQueryEventListener(EventListener):
def on_event(self, event, extension):
items = []
logger.info('preferences %s' % json.dumps(extension.preferences))
logger.info(event.get_keyword()) # gives the keyword 'tm'
items.append(ExtensionResultItem(icon='images/icon.png',
name='YYYY-MM-DD',
description='{0:%Y-%m-%d}'.format(datetime.datetime.now()),
on_enter=CopyToClipboardAction('{0:%Y-%m-%d}'.format(datetime.datetime.now()))))
items.append(ExtensionResultItem(icon='images/icon.png',
name='HH:mm',
description='{0:%H:%M}'.format(datetime.datetime.now()),
on_enter=CopyToClipboardAction(
'{0:%H:%M}'.format(datetime.datetime.now()))))
items.append(ExtensionResultItem(icon='images/icon.png',
name='YYYY-MM-DD HH:mm',
description='{0:%Y-%m-%d %H:%M}'.format(datetime.datetime.now()),
on_enter=CopyToClipboardAction(
'{0:%Y-%m-%d %H:%M}'.format(datetime.datetime.now()))))
return RenderResultListAction(items)
if __name__ == '__main__':
DemoExtension().run()
As you can see KeywordQueryEventListener(EventListener)
and on_event
is run and RenderResultListAction(items)
is returned and presented to user.
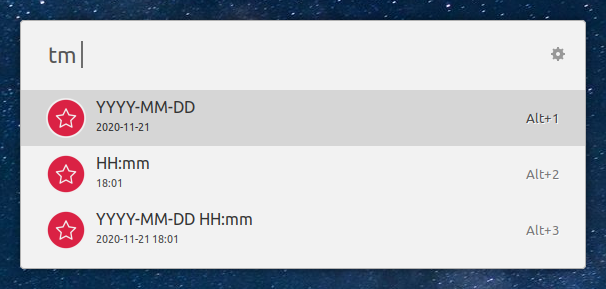
Our items
would be
Here is the screenshot of items:
Code for item:
items.append(ExtensionResultItem(icon='images/icon.png',
name='YYYY-MM-DD',
description='{0:%Y-%m-%d}'.format(datetime.datetime.now()),
on_enter=CopyToClipboardAction('{0:%Y-%m-%d}'.format(datetime.datetime.now()))))
Explanation for ExtensionResultItem
:
name
- title shown to user, look at screenshot above
description
- subtext which is also shown to user, look at screenshot above
on_enter
- most important part, says what to do if user clicks on this items. In my case, it is CopyToClipboardAction
action which copies data to clipboard.
At the end, I developed extension with enabled me to discard my custom bash scripts and forget about keyboard shortcuts for them.
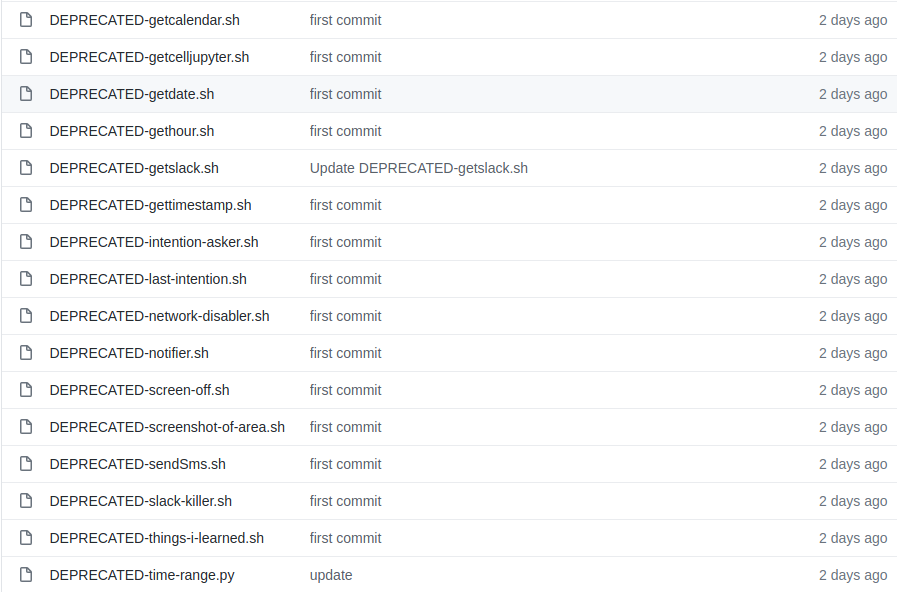
Deprecated bash scripts 😄
]]>
I wanted to send emails to my users on https://weekhabit.paraboly.com.
Of course, I started with mail sending services like SendGrid, Mailchimp, SendInBlue. They are awesome services but I faced with various difficulties:
For introduction, Amazon SES
As any programmer, I wanted to code this mail sending. 😀
Here is ther overview of CLI(AWS CLI must be installed and made login) commands for SES(more information can found in SES docs)
aws ses list-templates
aws ses get-template --template-name simple-template
aws ses create-template --cli-input-json file://simple-template.json
aws ses update-template --cli-input-json file://simple-template.json
aws ses send-templated-email --cli-input-json file://simple-template-single-user.json
aws ses send-bulk-templated-email --cli-input-json file://simple-template-bulk-users.json
Example of simple-template.json
{
"Template": {
"TemplateName": "simple-template",
"SubjectPart": "Greetings, !",
"HtmlPart": "<h1>Hello ,</h1><p>Your favorite animal is .</p>",
"TextPart": "Dear ,\r\nYour favorite animal is ."
}
}
Example of simple-template-single-user.json
{
"Source":"WeekHabit Team <week-habit-team@paraboly.com>",
"Template": "mjml",
"ConfigurationSetName": "ConfigSet",
"Destination": {
"ToAddresses": [ "someuser@gmail.com"
]
},
"TemplateData": "{ \"name\":\"Alejandro\", \"favoriteanimal\": \"alligator\" }"
}
Note: ConfigSet
must be created in Amazon SES console otherwise email will not be sent.
Did you notice that HtmlPart
is very simple and more suitable for system emails where style is not important.
Also Amazon SES doesn’t have template editor, so how to create responsive and stylish email?(One of many advantages of email services)
The mjml is tool which allows create responsive email. It has nice editor where you can design email template.
Standard workflow for generating email template html:
simple-template.mjml
mjml
)
./node_modules/.bin/mjml -r simple-template.mjml -o simple-template.html
new-template.html
to HtmlPart
part of simple-template.json
described above.template
by runningaws ses update-template --cli-input-json file://simple-template.json
Example:
]]>Article on dev.to
Article on Medium
We have many microservices that run on multiple deployments. I wanted to add security by using Keycloak with the help of JWT.
One of the earliest solution was to use Keycloak Js Adapter. Yet, Keycloak JS adapter requires following:
var keycloakConfig = {
clientId: 'nodejs-microservice',
bearerOnly: true,
serverUrl: 'http://localhost:8080/auth',
realm: 'Demo-Realm',
credentials: {
secret: '62c99f7c-da55-48fb-ae4e-a27f132546b7'
}
};
which seems cumbersome way of doing this.
I thought there must be more simple way, I just wanted to validate requests.
That’s why I liked Spring Boot approach which is:
<dependency>
<groupId>org.springframework.boot</groupId>
<artifactId>spring-boot-starter-oauth2-resource-server</artifactId>
</dependency>
spring.security.oauth2.resourceserver.jwt.issuer-uri = http://localhost:8080/auth/realms/appsdeveloperblog
At start, it fetches makes request to issuer-uri
which has response like this
{
"realm": "appsdeveloperblog",
"public_key": "...",
"token-service": "http://localhost:8080/auth/appsdeveloperblog/master/protocol/openid-connect",
"account-service": "http://localhost:8080/realms/appsdeveloperblog/account",
"tokens-not-before": 0
}
and stores public_key
which is used to validate JWT tokens. It doesn’t make request each time to verify JWT.
As result, any request is validated and working out of box.
So I wanted to replicate this on NodeJS.
I started with express-jwt and simple example was like this
var jwt = require('express-jwt');
app.get('/protected',
jwt({ secret: 'shhhhhhared-secret', algorithms: ['HS256'] }),
function(req, res) {
if (!req.user.admin) return res.sendStatus(401);
res.sendStatus(200);
});
//Or with public key, shortened
var publicKey = fs.readFileSync('/path/to/public.pub');
jwt({ secret: publicKey, algorithms: ['RS256'] });
However it was problem for us to provide public key because
We couldn’t maintain this so I decided to implement like in Spring Boot.
With the help sync-request
package:
const res = request('GET', 'http://localhost:8080/auth/realms/appsdeveloperblog');
const response = JSON.parse(res.getBody().toString());
const publicKey = `-----BEGIN PUBLIC KEY-----\r\n${response.public_key}\r\n-----END PUBLIC KEY-----`;
app.use(jwt({ secret: publicKey, algorithms: ['RS256'] }));
I achieved on-start fetch of public key without cumbersome settings on NodeJS.
]]>